Showing posts with label low carb. Show all posts

11/30/18

Keto Collagen French Toast (Low Carb, Sugar Free)


Ahhhhh French Toast!!

I'm pretty sure I haven't had French Toast of any kind any time during this entire decade, until just recently. Because with all its simple carbs and added sugars, it was just something that I felt did not have a place in my healthy diet.

This version however has ZERO net carbs and ZERO added sugar. And that INCLUDES the bread. It's also gluten-free, grain-free and dairy-free.

Plus, it's got grass-fed collagen protein in it.

And it's all so delicious.

Mind blown?

The bread is my zero net carb Keto Collagen Bread which you can find the recipe for right here. And if you're local to Orange County, California, feel free to message me to find out how you can pick up a freshly-baked loaf made just for you.

The maple syrup and powdered sugar are both made from monkfruit and erythritol and below are the ones I recommend as they are non-GMO and in my opinion, taste as close to their regular insulin-spiking counterparts as it gets. With no insulin spike.


It's simple to whip up as long as you've got the bread already on hand. If you don't have any, just bookmark this recipe and be sure to come back to it the next time you've got a loaf of my Keto Collagen Bread made up and sitting in your fridge. Or feel free to use your favorite low carb bread of choice (macros will change accordingly).

Keto Collagen French Toast

Serves 4 (2 slices each)

8 slices of Keto Collagen Bread
2 pastured eggs, beaten
1/4 cup canned full fat coconut milk (or unsweetened almond milk)
1 1/2 Tablespoons Lakanto Powdered Monkfruit Sweetener, plus more for sprinkling on top
1 teaspoon cinnamon, plus more for sprinkling on top
Lakanto Monkfruit Sweetened Maple Flavored Sugar-Free Syrup
1 Tablespoon unflavored coconut oil

In a shallow bowl, mix together the eggs, coconut or almond milk, powdered sweetener and cinnamon and set aside.

Heat a skillet to medium and add the coconut oil.

Dip the bread slices in the egg mixture coating both sides quickly and not allowing it to sit in the mixture as it could get soggy. Place the coated bread slices in your heated skillet. Lightly sear on both sides and remove.

Serve immediately with a drizzle of the maple syrup and a sprinkle of powdered sweetener and cinnamon.

(This post contains affiliate links. If you buy something using one of these links I may earn a commission but it will not affect the price you pay. This helps me continue to provide recipes and content for free.)


10/29/18

Easy Sunday Roast - Paleo, Keto, Low Carb


It's that time of year, even here in Southern California, where a big bowl of hearty and tender roast and root vegetables just hits the spot. I usually make mine in the slow cooker so I can set it and forget it. Doing it this way makes it easy so you can make it any day of the week and come home to a wonderful meal.  But there's something about Sundays and pot roasts that just seem to fit cozily together, so I often make these on the weekend with enough left over to have during the week, too. I like to use the leftover roast to make sandwiches (using my zero net carb Keto Collagen Bread), or tacos usually using jicama tortillas or something grain and gluten free for the shells.

The roast makes its own juices which is flavored perfectly by the veggies and a few simple herbs and seasonings. I recommend using the best quality beef that is available to you (grass-fed, humanely raised, hormone and antibiotic free, local if possible, etc.). This way the beef, as well as the fat and juices are better for you.

Easy Sunday Roast
serves 6-8 with leftovers for round-two meals

3-4 lb grass-fed beef chuck roast
3-4 large organic carrots, cut into small chunks
1 large bunch of organic celery, diced
1/2 organic white or yellow onion, chopped
4 stems fresh organic thyme*
3-4 stems fresh organic oregano*
2 teaspoons organic onion powder
2 teaspoons organic garlic powder
2 teaspoons Himalayan pink salt

Place everything in a slow cooker set to low, cover and cook for 8 hours or until roast is fall apart tender. Finish with flaky sea salt to taste and a garnish of fresh oregano.

You do not need to add any water or anything to your slow cooker as the roast will develop its own juices. However, if desired, you may wish to add a small amount of good quality oil, ghee or butter, if your roast is extra lean.

*To make it easier to remove the stems from the thyme and oregano, you may tie them together in a bunch using kitchen twine, then place in the slow cooker. When it's done you can easily remove and discard what's left of the bunch.


5/18/18

Keto Collagen Bread - Bulletproof, Paleo, Keto


Keto Collagen Bread - Zero Net Carbs Per Slice!! It's also Bulletproof and Paleo - which means it's dairy free, grain free, gluten free and it uses heat stable collagen protein. Grass-fed hydrolyzed collagen protein is reported to help support healthy skin, hair, nails, joints, gut health and anti-aging just to name a few of its many benefits. I have some in my diet every day.

This bread is fluffy, delicious, not too eggy and all this with no carbs per slice. The loaf is standard size and sliced into 12 generous slices. The macros per slice are approximately 77 cals, 5g fat, 7g protein, 0g net carbs (1g carbs - 1g fiber). You can easily up the fat content when consuming this bread simply by adding a big slather of ghee or butter, but the possibilities are endless.

If you've ever tried baking bread using collagen protein as your flour source, then you know how challenging it is to get it to stay fluffy and bread like. My goal with this recipe was to make a collagen bread that was as close to regular bread as possible, yet keep the carbs extremely low or zero and not use dairy. This recipe certainly feels like I’m eating regular bread again and that can be helpful, especially when you’re transitioning to a Keto or Bulletproof diet.

Add it to your arsenal of other wonderful bread recipes that are Paleo, Keto and/or Bulletproof. I think you’ll find it’s an awesome addition to your recipe box, and for sure when you’re going ultra low carb, this recipe will hopefully rise to the top of your list.

I'm thrilled with the outcome and I hope you will be, too. Would love to hear your feedback after making this bread.

(This post contains affiliate links. If you buy something using one of these links I may earn a commission but it will not affect the price you pay. This helps me continue to provide recipes and content for free.)

Keto Collagen Bread
makes 1 standard size loaf, 12 slices

Oven 325 degrees F

5 pastured eggs, separated
1 Tablespoon unflavored liquid coconut oil (I use Bulletproof Brain Octane Oil)
1/2 cup plain grass-fed hydrolyzed collagen powder (I use Bulletproof Unflavored Collagen Protein)
6 Tablespoons *almond flour (see coconut flour substitution below)
1 teaspoon aluminum-free baking powder
1 teaspoon **xanthan gum (see xanthan gum substitutions below)
pinch of Himalayan pink salt
optional: pinch of stevia

Instructions:
  1. Preheat oven to 325 degrees F. 
  2. Generously oil only the *bottom part of a standard size (1.5 quart) glass or ceramic loaf dish with coconut oil (or butter or ghee). Or you may use a piece of parchment paper trimmed to fit the bottom of your dish. *Not oiling or lining the sides of your dish will allow the bread to attach to the sides and stay lifted while it cools. 
  3. In a large bowl, beat the egg whites until stiff peaks form and set aside. 
  4. In a small bowl whisk the dry ingredients (collagen, almond flour, baking powder, xanthan gum, salt) together and set aside. Add the optional pinch of stevia if you’re not a fan of eggs. It’ll help offset the slight egg flavor without adding sweetness to your loaf.
  5. In a small bowl whisk the egg yolks and liquid coconut oil together and set aside.
  6. Add both bowls of ingredients to the egg whites and gently mix until incorporated. Batter will be thick and a little gooey.
  7. Pour the batter into the oiled or lined dish and place in the oven.
  8. Bake for 40 minutes. The bread will rise significantly in the oven.
  9. Remove from oven and let cool completely - about 1-2 hours. The bread will sink some. If you want to keep the center of the bread from sinking a little lower than the sides you can cool the bread (in its dish) upside down on a cooling rack.
  10. Once the bread is cooled, run the sharp edge of a knife around the edges of the dish to release the loaf.
  11. Slice into 12 even slices.
*Optional Coconut Flour Substitution: You may substitute 6 Tablespoons of raw coconut flour for the almond flour but you will need to also add 3 Tablespoons of full fat canned coconut milk to the recipe as well. This substitution will increase the carb content of the recipe to approximately 1-2 grams of net carbs per slice instead of zero.

**Optional Xanthan Gum Substitutions: You may substitute 2 teaspoons of Pamela's "Not Xanthan Not Guar" OR 3/4 teaspoon of konjac flour in place of the xanthan gum. Neither of these substitutions will change the net carbs per slice.

Storing Leftovers: Store loosely covered in the refrigerator for up to 5 days.

Reheating: You can eat this bread cold (it stays nice and moist), or bring to room temperature by setting it out on the counter, or pan sear on the stovetop with ghee or butter. I don't recommend toasting it in a toaster. Although it does work, it's not my preferred method as it has a tendency to dry out too quickly.

Usage: Use just like regular bread - it makes delicious cold sandwiches, cinnamon sugar toast or French toast, garlic bread, dipping bread, use it as a hamburger "bun", make some avocado toast topped with a poached egg, literally anything you would do with "regular" bread.

Tasting Notes: To set expectations correctly, you should understand that this is not gluten bread nor is it Paleo bread, both of which generally have a significant amount of carbs, coming from starches and sugars. Rather, this is a very low carb/zero carb bread alternative. With that said, you may taste "eggs", especially if you're not a fan of eggs. Additionally, the texture is lighter than gluten bread and won't have the "chew" you may be accustomed to. However, if you're a seasoned low carb bread eater, I think you'll find this to be a wonderful option. Bonus that it contains collagen protein and no cheese or other dairy!

Let me know what you think in the comments below and be sure to subscribe via email to receive these recipes delivered right to your inbox.


Top with avocado and a poached egg

For this pizza bread (not dairy free), just add the toppings of your choice and place under the broiler for 1-2 minutes
Makes for an excellent cold sandwich like this turkey, avocado, mayo one.

Top with almond butter and your favorite no sugar jam for a healthy PB&J

Always good with a big slather of grass-fed butter or ghee

4/4/18

Easy Two Ingredient Slow Cooker Carnitas

Easy Two Ingredient Slow Cooker Carnitas over Sweet Potato

It really, seriously doesn't get any easier than this one. Put these two things in your slow cooker, let it go all day and dinner is ready when you get home from work: 1) pork shoulder/pork butt roast, 2) your favorite taco seasoning packet. I use Simply Organic "Spicy Taco" Seasoning Mix - it's fabulously full of flavor, not too spicy in my opinion, gluten free and organic. You can most likely find it at your local market or use the link I provided to order from Amazon.

IF you wanted to get really fancy, you could add some fresh or canned organic diced tomatoes, onions and/or green chiles (or maybe a can of Ro-Tel) but it's totally not necessary. Like really, really only if you want to go the extra mile here.

No matter what though, these shredded pork carnitas are amazing. You can use them in tacos, taco salads, over eggs, on a sweet potato, put it on a pizza - the possibilities are endless. And did I tell you how easy they are to make?! Just two ingredients, throw 'em in the slow cooker and you're done.

Easy Two-Ingredient Slow Cooker Carnitas
serves 6-8

Ingredients:
1 - 2 lb all natural pork shoulder or pork butt roast
1 - 1.1 oz packet taco seasoning mix (I use Simply Organic "Spicy Taco")
(Optional: fresh or canned diced tomatoes, onions and/or green chiles)

Place in a slow cooker set to low for 8 hours, or on high for 4 hours. Use two forks to shred, mix with all the juices and serve.


Taco Salad: Easy Two Ingredient Slow Cooker Carnitas over Salad

Tacos: Easy Two Ingredient Slow Cooker Carnitas over Almond Flour Tortilla

What's your favorite way to enjoy carnitas?


12/2/17

White Bullet Martini (Low Carb, Gluten Free)


White Bullet Martini with Trust Me Gluten Free Vodka
Photo: Equinox Photo
As previously mentioned, I recently partnered with Trust Me Vodka, an amazingly clean-tasting gluten-free vodka. It's the perfect addition to any cocktail.

I've created several holiday-themed vodka cocktails that are also Bulletproof Diet friendly so you can stay on plan and hopefully hangover free throughout the holidays. Drinking alcohol is not technically "Bulletproof", however if you are going to drink, you'll want to minimize the negative effects you get from a typical cocktail that is most likely a sugar/carb/gluten bomb - a recipe for hangovers and weight gain. You might also want to leverage this alcohol guide published by Bulletproof. I personally swear by their Bulletproof Coconut Charcoal and always carry it with me.

This creamy concoction is a play on a "White Russian" but without the heavy dairy, sugar and carbs traditionally found in this drink. Instead, you'll start with a creamy Bulletproof Coffee Cold Brew - any flavor works well - and add gluten-free vodka. Trust Me Gluten Free Vodka is my favorite.

White Bullet
makes one martini

2 oz. Trust Me Gluten Free Vodka
½ of a Bulletproof Cold Brew Coffee, or about 6 oz (any flavor or pick the one with Collagen for an added boost of protein)
pinch of Himalayan pink salt
candy cane garnish (optional and not Bulletproof)

Fill a cocktail shaker half full of ice and add Trust Me Gluten Free Vodka and Bulletproof Cold Brew Coffee. Shake well, then strain into a martini glass. Add the Bulletproof Fudge Brownie Collagen Bar crumbles to the top and a pinch of Himalayan pink salt and serve. It's that easy.

PS – Remember when you were a kid and used to dip your cookies in your glass of milk and then when you got to the bottom there was all that mushy cookie crumble goodness? That’s what you’ll find at the bottom of this martini - yum.

Optional: Add a candy cane garnish if you’re feeling extra festive, just remember the candy cane (sugar) isn’t Bulletproof.

Yum!
Photo: Equinox Photo


11/17/17

White Sage Elixir Martini (Low Carb, Gluten Free)

White Sage Elixir Martini with Trust Me Gluten-Free Vodka
Photo: Equinox Photo

This holiday season, I've partnered with Trust Me Vodka, an amazing gluten-free vodka that tastes every bit as great as their artistic bottles look. They offer an organic version of their vodka, as well as this gluten free. This vodka tastes clean and light, making it the perfect addition to any cocktail.

I've created several holiday-themed vodka cocktails that are also Bulletproof Diet friendly so you can stay on plan and hopefully hangover free throughout the holidays. Drinking alcohol is not technically "Bulletproof", however if you are going to drink, you'll want to minimize the negative effects you get from a typical cocktail that is most likely a sugar/carb/gluten bomb - a recipe for hangovers and weight gain. You might also want to leverage this alcohol guide published by Bulletproof. I personally swear by their Bulletproof Coconut Charcoal and always carry it with me.

The first recipe I'll share is this White Sage Elixir Martini. It's mildly sweet despite not having any added sugar - thanks to the addition of Bulletproof FATWater infused with B vitamins and Brain Octane. The blood orange falls in the “suspect” or yellow zone of the Bulletproof Diet Roadmap. There is only a small amount (juice of 1/2 an orange, or approximately 1 ounce) in this drink however, please be aware in case you are sensitive to oranges. The fresh sage adds a dimension that doesn't overpower yet is noticeable in just the right way. And let's face it, this cocktail is stunning to look at.

Impress your friends with this craft cocktail that is actually very easy to make. Fancy ice cube optional.

White Sage Elixir Martini
makes one cocktail

2 oz. Trust Me Gluten Free Vodka
½ of a blood orange, freshly squeezed (or 1/2 of a medium size orange, if blood oranges aren’t in season)
½ of a lime, freshly squeezed
Bulletproof Mango FATWater (or your favorite FATWater flavor) to top it off
leaf of fresh white sage (or regular sage)
pomegranate arils/seeds (optional)

Fill a cocktail shaker half full of ice and add Trust Me Gluten Free Vodka, blood orange juice and lime juice. Shake well, then strain into an ice-filled rocks glass that has been rimmed with fresh sage (just rub the rim of the glass with the sage). Smack the sage between your palms to release more of its aromatic oils, then place the leaf in the cocktail. Top off with FATWater. FATWater is delicious and adds just the right amount of sweetness to this cocktail without adding any sugar. It’s also infused with Brain Octane oil and B vitamins to help keep you hydrated and hangover free.

Optional: Add a teaspoon or so of pomegranate arils to the cocktail for a splash of red color. You may also consume the arils which are a source of vitamins, like vitamin K and C, and polyphenols.

Optional: For an extra special presentation, use a fancy ice cube like the round one pictured and float the sage leaf on top before serving.

Pomegranate Arils make a pretty addition to this cocktail
Photo: Equinox Photo
Fill with Bulletproof FATWater
Photo: Equinox Photo
A delicious combo
Photo: Equinox Photo


3/28/17

Iced Vanilla Protein Latte (Sugar Free)

Invariably, I make a pot of freshly brewed coffee in the morning aiming for the exact correct number of cups we'll want yet end up with some small amount left over. I have many uses for it, like making ice cubes, making extra Bulletproof Coffee and keeping in the fridge for later, or even just letting it sit there until it gets cold and drinking it that way. On this day though, I decided a "Protein Latte" was in order. Pretty simple but the steps kinda matter in order to preserve nutrients so here you go..

Iced Vanilla Protein Latte (Sugar Free)
Makes 1

8 ounces coffee (hot, warm or cold)
1-2 teaspoons Birch Xylitol (I like Xyla) or your favorite no sugar sweetener
1 scoop Natural Stacks Natural Protein Powder in Madagascar Vanilla Bean (or your favorite healthy plain vanilla protein powder, with no added sugar)
1/4 teaspoon pure vanilla extract
3 Tablespoons organic raw cream from pasture-raised cows (or organic cream from pasture-raised cows if you can't get raw)

Pour the *warm or *hot coffee into a blender and add the birch xylitol sweetener. Blend until it dissolves. *If your coffee is already cold, you will need to warm it enough so the xylitol will melt/dissolve.

Next, add a few ice cubes to the blender of warm/hot coffee and blend to cool it down. This is important so you preserve the nutrients in the whey protein powder and more importantly in the raw cream. It's no longer raw, if it gets heated.

Now add the remaining ingredients and blend until frothy. Serve over ice cubes.

Do you want to take this to the "next level" in health? Try blending in a Tablespoon of Natural Stacks Prebiotic+ to the finished (cold) mixture. This is the "food" that your good gut bacteria likes to eat. Getting a fair amount of natural probiotics from foods we eat (like yogurt, kefir, raw sauerkraut, etc)  is fairly simple but feeding those good gut bacteria with prebiotics can be more challenging. I like Prebiotic+ because it's all natural and it's easy to get into my diet.

Use "VC20" for 20% off your entire order at www.naturalstacks.com


10/18/16

Daikon Radish Noodles - Low Carb, Paleo, Bulletproof


The Daikon Radish is a member of the radish family and is popular in many Asian cultures. Often eaten raw or in stir-fries, this large white root will also double as an excellent noodle substitute. Yep, you heard me correctly! It's large and white and once it's spiralized it looks similar to a spaghetti noodle so hey, why not?! I call them Doodles and I hope this method catches on. They're low in carbs and high in fiber and vitamins making them an excellent choice for good health.


To prep the Daikon radish, you simply scrub the outside to clean it. No need to peel. Trim the small ends off to make it easy to spiralize.

If you eat Doodles raw, they will maintain their sharp bite, not unlike a regular red radish. BUT if you gently cook them in some boiling water for a few minutes, magically the sharpness disappears and you're left with a mild, pretty much flavorless (read: blank canvas) Doodle ready for your own creation.


So these make the perfect substitution for noodles. You can theme them any way you like. I recently prepared them two ways for my weekly meal prep - an Italian presentation and an Asian version (recipes for both options at the bottom).


To make this meal prep easier, I used these already-roasted Brussels Sprouts from Melissa's Produce. They are perfect - seasoned only with olive oil, salt and pepper. Just open the package and toss some in your prep containers. I got 2 servings from each package.


Speaking of prep containers, man do I love these BPA-free, totally leak proof ones from OXO. Very stackable and they have snap tight lids. They're called "Good Grips SNAP Plastic Containers" and these are the 3 cup size, which is perfect for an individual meal.


On to the recipes! These recipes are low carb, Paleo and Bulletproof Diet friendly. That means they are gluten-free, grain-free, dairy-free and have no added sugar!

Time-Saver Tip: If making both of these dishes at the same time, save time by spiralizing and cooking two daikon radishes (enough for both recipes) at one time, and cooking 1 1/2 lbs of pasture-raised grass-fed beef in one skillet, then dividing into two skillets to add sauces separately.

Doodles Bolognese
Serves 2

3/4 lb pasture-raised grass-fed 70/30 ground beef (or use 80/20)
1 cup Rao's Marinara Sauce (the one with no added sugar)
1 large daikon radish root, spiraled ("Doodles")
pinch of Himalayan pink salt

In a skillet, cook the ground beef over medium heat until done, breaking it up as you go. Add the marinara sauce and stir. Reduce heat to low-medium while you prepare your doodles.

Meanwhile, place your doodles in a pot of gently boiling water and cook for approximately 3-4 minutes. Doodles will still be firm but not crunchy. Drain doodles.

Sprinkle cooked doodles with a pinch of Himalayan pink salt, then cover with bolognese sauce and serve (or divide evenly between two meal prep containers).


Doodles Bolognese


Asian Doodles with Spicy Almond Sauce


Asian Doodles with Spicy Almond Sauce
Serves 2

3/4 lb pasture-raised grass-fed 70/30 ground beef (or use 80/20)
1 large clove garlic, pressed or finely minced
1 serrano pepper, minced or finely diced
1 cup chopped purple napa cabbage (or regular napa cabbage)
2 Tablespoons coconut aminos
2 Tablespoons Brain Octane Oil (or MCT Oil or Coconut Oil)
1 1/2 Tablespoons O Ginger Rice Vinegar (or Rice Vinegar)
1 Tablespoon sriracha sauce (more of less depending on how spicy you like it)
2 teaspoons almond butter
2 teaspoons fish sauce
1/2 lime, squeezed (reserve other half to serve with the dish)
1 large daikon radish root, spiralized ("Doodles")
pinch of Himalayan pink salt

In a skillet, cook the ground beef over medium heat until done, breaking it up as you go. Add garlic, serrano and napa cabbage and stir. Reduce heat to low-medium while you make your sauce.

In a small bowl, mix coconut aminos, Brain Octane oil, Ginger Rice Vinegar, sriracha, almond butter, fish sauce and lime juice together whisking until well blended. Taste and adjust for seasoning. Pour into skillet with meat mixture and stir.


Spicy Almond Sauce

Meanwhile, place your doodles in a pot of gently boiling water and cook for approximately 3-4 minutes. Doodles will still be firm but not crunchy. Drain doodles.

Sprinkle cooked doodles with a pinch of Himalayan pink salt, then cover with spicy almond sauce and serve (or divide evenly between two meal prep containers). Garnish with wedge of lime.


Asian Doodles with Spicy Almond Sauce


Eating at your desk never tasted so good!!

XOXO,
Veronica


8/26/16

Italian Style Meatloaf (Low Carb, Paleo and Bulletproof Option)

Italian Style Meatloaf

I never get tired of meatloaf. There are endless ways to theme it, but one of my favorites is Italian style. And let me just say that any time I can get Italian AND it's low carb, I'm a happy camper.  Therefore, I make my meatloaf (and meatballs for that matter) sans any kind of breading or starchy filler - it's simply not needed.

Often times I will use a blend of different meats (beef, lamb, pork, etc.) but for this very simple version today, I used only beef (100% grass-fed). To complete my low carb meal, I paired the meatloaf with a side of Caulimash (steamed organic cauliflower, grass-fed butter, sea salt, organic sour cream and organic cream cheese blended together in a food processor until smooth - leave out the cheese and sour cream to make Paleo and Bulletproof) and a fresh salad of shaved raw organic zucchini with sea salt.

For plating, I spooned some of the drippings from the meatloaf over the dish along with a garnish of fresh oregano right before serving, and for a little extra punch (and mostly because it happens to be Hatch Chile Season right now), I added some roasted Hatch chiles as well - totally optional and not Italian but it worked.

To make this meatloaf Paleo and Bulletproof, leave out the cheese.

Lastly, this meal is entirely naturally gluten-free - always a good thing.

Italian Style Meatloaf
Oven 350 degrees F
Serves 4-6

Ingredients:
1 3/4 lb. 100% grass-fed ground beef (as fatty as possible, see Cook's Note)
1 pastured egg
3/4 cup shredded organic Italian cheese blend, divided (I used Whole Foods 365 Organic Italian Blend which has provolone, parmesan, asiago and fontina) (omit to make Paleo and Bulletproof)
1/4 cup marinara (I use this one, or make my own)
2 Tablespoons organic Italian seasoning (I used this one)
3 teaspoons Himalayan pink salt
2 sprigs fresh organic oregano, leaves only, optional for garnish

Be sure your oven is preheating to 350 degrees F.

Place all of the ingredients, except 1/4 cup of the cheese (reserve to top the meatloaf with it), in a large bowl and mix well with your hands.

Press the mixture into a deep dish loaf pan or dish and top with the remaining 1/4 cup of cheese evenly sprinkled across the top. If omitting the cheese, consider spreading a little of the marinara sauce across the top instead.

Bake in the oven for approximately 35 - 40 minutes. Remove from oven and let rest a few minutes before slicing and serving. Garnish with fresh oregano if desired, and don't forget to drizzle all those good juices from the pan over the top!

Cook's Note: Shoot for the fattiest grass-fed ground beef you can find. If grass-fed ground beef is not available, go for extra lean ground beef and add 1-2 Tablespoons of a healthy fat such as unflavored coconut oil, extra virgin olive oil, or even better - use this MCT oil, to your mixture before cooking. Grass-fed, pasture-raised beef naturally contains a good dose of healthy Omega 3 and CLA fatty acids which are good for you. Conversely, feedlot or factory farmed cattle contain high doses of unhealthy fats (often in addition to antibiotics and growth hormones), so choosing extra lean when eating this type of beef and then adding your own healthy fats is a better idea.

Out of the oven with a little fresh oregano added:


SaveSave
SaveSave
SaveSave

3/14/16

Parmesan Crusted Halibut - Paleo, Keto, Bulletproof


This Parmesan Crusted Halibut is not only amazingly delicious and good for you, but it's also easy to make and cooks in about 15-20 minutes! Wild-caught halibut is a mild-tasting lean fish with lots of protein, zero carbs and it's a good source for heart-healthy Omega 3 fatty acids. It's the perfect vessel for this rich and flavorful preparation.

This dish is Paleo if you tolerate cheese and if you don't, I've got a modification for you below. Bonus - the modification also makes it Bulletproof Diet friendly.

Here's how you make it:

Parmesan Crusted Halibut - Paleo, Keto, Bulletproof
Serves 4
Oven 350 degrees F
Prep Time: 5 minutes
Cook Time: 15-20 minutes

Ingredients:
1 Tablespoon + 4 pats grass-fed butter to finish - optional (I use Kerrygold)
4 6-ounce pieces wild-caught halibut
Himalayan pink salt or sea salt
3 teaspoons dried Italian seasoning, divided
1/4 cup Bulletproof Mayo (watch how-to-make video), Primal Kitchen Mayo, or your favorite
4 teaspoons almond meal or almond flour (I use Bob's Red Mill)
4 teaspoons grated Parmigiano Reggiano (omit to make Bulletproof or if you don't tolerate cheese)
1/4 cup shredded Asiago cheese (omit to make Bulletproof or if you don't tolerate cheese)

Preheat oven to 350 degrees F.

Butter a large baking dish with 1 Tablespoon of the butter.

Lay the 4 pieces of halibut evenly spaced across the bottom of the dish.

Sprinkle each filet with a light dusting of Himalayan pink salt or sea salt.

Sprinkle half of the dried Italian seasoning evenly across each filet, reserve the other half.

Spread the mayo evenly across each filet.

Sprinkle each filet with 1 teaspoon of the almond meal or almond flour.

If omitting the cheese, sprinkle each filet evenly with the remaining dried Italian seasoning. Otherwise, continue by evenly coating each filet with the Parmigiano Reggiano and Asiago cheeses, then top with remaining dried Italian seasoning.

Place the dish in the oven uncovered and cook for approximately 15-20 minutes or until the fish is opaque white in the middle and the top is lightly browned. If using cheese, you may wish to place under the broiler for about 1 minute to get a nice crispy crust.

Remove from oven and serve with a pat of grass-fed butter atop each (optional).

Serving Suggestion: I like to plate my fish atop a bed of greens (like the baby arugula pictured) and drizzle everything with a little Bulletproof Brain Octane (or you can use MCT Oil or unflavored coconut oil) and additional sea salt. The heat from the fish lightly wilts the greens and the addition of healthy oils are satiating and good for keeping my brain and body fit and performing optimally.


2/18/16

2 Ingredient Low Carb Bread - Bulletproof, Keto, Paleo


If you have been following a low carb or grain-free eating plan and thought you had to give up on bread, this two-ingredient version will make you lose your mind.

It has NO GRAINS or flour of any kind - just eggs and whey protein. That means practically ZERO CARBS (just the ones coming from the whey, about 4g for the whole loaf).

And it's fabulous.

Here's a quick one-minute video to show you just how easy it is to make:


Low Carb Bread with Only 2 Ingredients (Bulletproof, Keto, Paleo)
Recipe Adapted from The Ketogenic Cookbook

Makes 1 Loaf

Oven 325 degrees

Ingredients:
6 pastured eggs, separated
1/2 cup grass-fed Bulletproof Whey Protein (or your favorite grass-fed plain whey protein)

Preheat oven to 325 degrees. Use middle rack and remove any racks above as bread will expand while baking.

Generously butter a loaf pan/dish (I use a ceramic one).

Beat 6 egg whites until stiff peaks form - a hand mixer on high works well.

Add the whey and the 6 yolks, blend gently on low just until fully incorporated. Batter will be fluffy.

Pour batter into prepared dish and place in oven.

Bake for 40 minutes.

Remove and allow to cool completely. Loaf will sink to a normal height.

Once fully cooled, release from dish, slice and serve.

Leftovers will keep in the fridge for a few days.

Reheating recommendation: Heat a skillet to medium-high and add ghee or grass-fed butter, sear bread slices in skillet until lightly toasted on each side, about 30 seconds per side. Do not overheat.


Go ahead, have a sandwich!


7/20/15

Jalapeno Date Turkey Burgers {Low Carb Skinny Burgers}


These lean and healthy turkey burgers (aka "Skinny Burgers") are the perfect blend of heat and sweet! Fresh ingredients like raw jalapeño and dates up your turkey game, while the addition of healthy fats like coconut oil, help to keep the lean ground turkey from drying out on the grill.

These patties can be prepped in advance and stored covered in the fridge overnight, making them easy to pop on the grill for a weeknight meal or anytime. Your taste buds (and waistline) will thank you. Give 'em a whirl and let me know what you think.

Jalapeno Date Turkey Burgers
makes 4 patties
heat grill to medium high

1 lb. lean ground turkey breast
1 large raw jalapeño with seeds - small dice 3/4 of the jalapeño, reserve 1/4 to slice thin for garnish
2 raw dates, pitted and diced small
3-4 raw green onions, chopped small (whites and greens)
1 tsp onion powder
1 tsp garlic powder
1/4 tsp salt
1/4 tsp pepper
2 Tbsp *coconut oil (or olive oil), *liquid or melted coconut oil (use refined coconut oil for no coconut taste/aroma, see note below about liquid vs. melted coconut oil)
4 slices pepper jack cheese (optional)

Ingredients ready to mix in with the ground turkey breast

Mix all ingredients (except the reserved 1/4 of jalapeño) together in a bowl and form into 4 equal patties.

*Note: Liquid vs. Melted Coconut Oil - I used liquid coconut oil, which doesn't harden. You may also use melted coconut oil, but it may take a little more effort to get it evenly distributed with the cold ground turkey, since the temperature of the meat will make the melted oil start to solidify again. To help, you may mix all of the ingredients, except the turkey, first so the oil adheres to the little veggie and date bits, then mix that into your ground turkey for more even distribution.

Turkey burgers read for the grill!

Grill patties on medium high grill approximately 3-4 minutes on each side or until fully cooked. Be careful not to overcook.

I served these topped with melted pepper jack cheese (optional) garnished with a fresh, thinly sliced jalapeño atop a bed of fresh raw spinach with raw carrot chips and charred brussels sprouts (check out the recipe for the brussels here) for a healthy, low carb meal. They would be awesome on a soft bun with some yummy mayo, too!!

Yum!
Serving Suggestion:

How about an ice cold Omission (gluten free) Beer to go with that awesome meal?
Gluten Free Omission Beers (photo credit: www.OmissionBeer.com)


5/20/12

Easy Lean Shredded Pork Tacos


Shredded pork tacos often involve cooking a fatty, large pork shoulder or butt roast, which can be intimidating and difficult to maneuver. For an easy and lean version, try using a lean pork tenderloin. Seasoned with a packet of your favorite taco seasoning and cooked in your slow cooker yields flavorful and beautiful tacos with little effort. I also used low carb tortillas making this even healthier.

Easy Lean Shredded Pork Tacos

Serves 3-4, 2 tacos per person

Special Equipment:  Slow Cooker

Prep Time: 10 minutes, Cook Time: 3 1/2 hours on low

1 pound lean pork tenderloin
2 Tablespoons extra-virgin olive oil
1 packet taco seasoning mix, divided
1/2 cup chicken broth
8 low carb tortillas, regular size (I used La Tortilla Factory Smart & Delicious Original Tortillas)
Optional garnishes: chopped cilantro, chopped onion, shredded cheddar cheese, sour cream/Greek yogurt

Heat a large cast iron or regular skillet on stove over high heat.

Remove pork tenderloin from wrapper and rub with olive oil first,  then rub half of taco seasoning packet to coat well and set aside. Reserve remaining half of taco seasoning.

unwrap pork tenderloin and rub olive oil all over to coat
use half of taco seasoning packet and rub all over to coat

In slow cooker set to low, add chicken broth and remaining half of taco seasoning and stir till well mixed. Set aside.

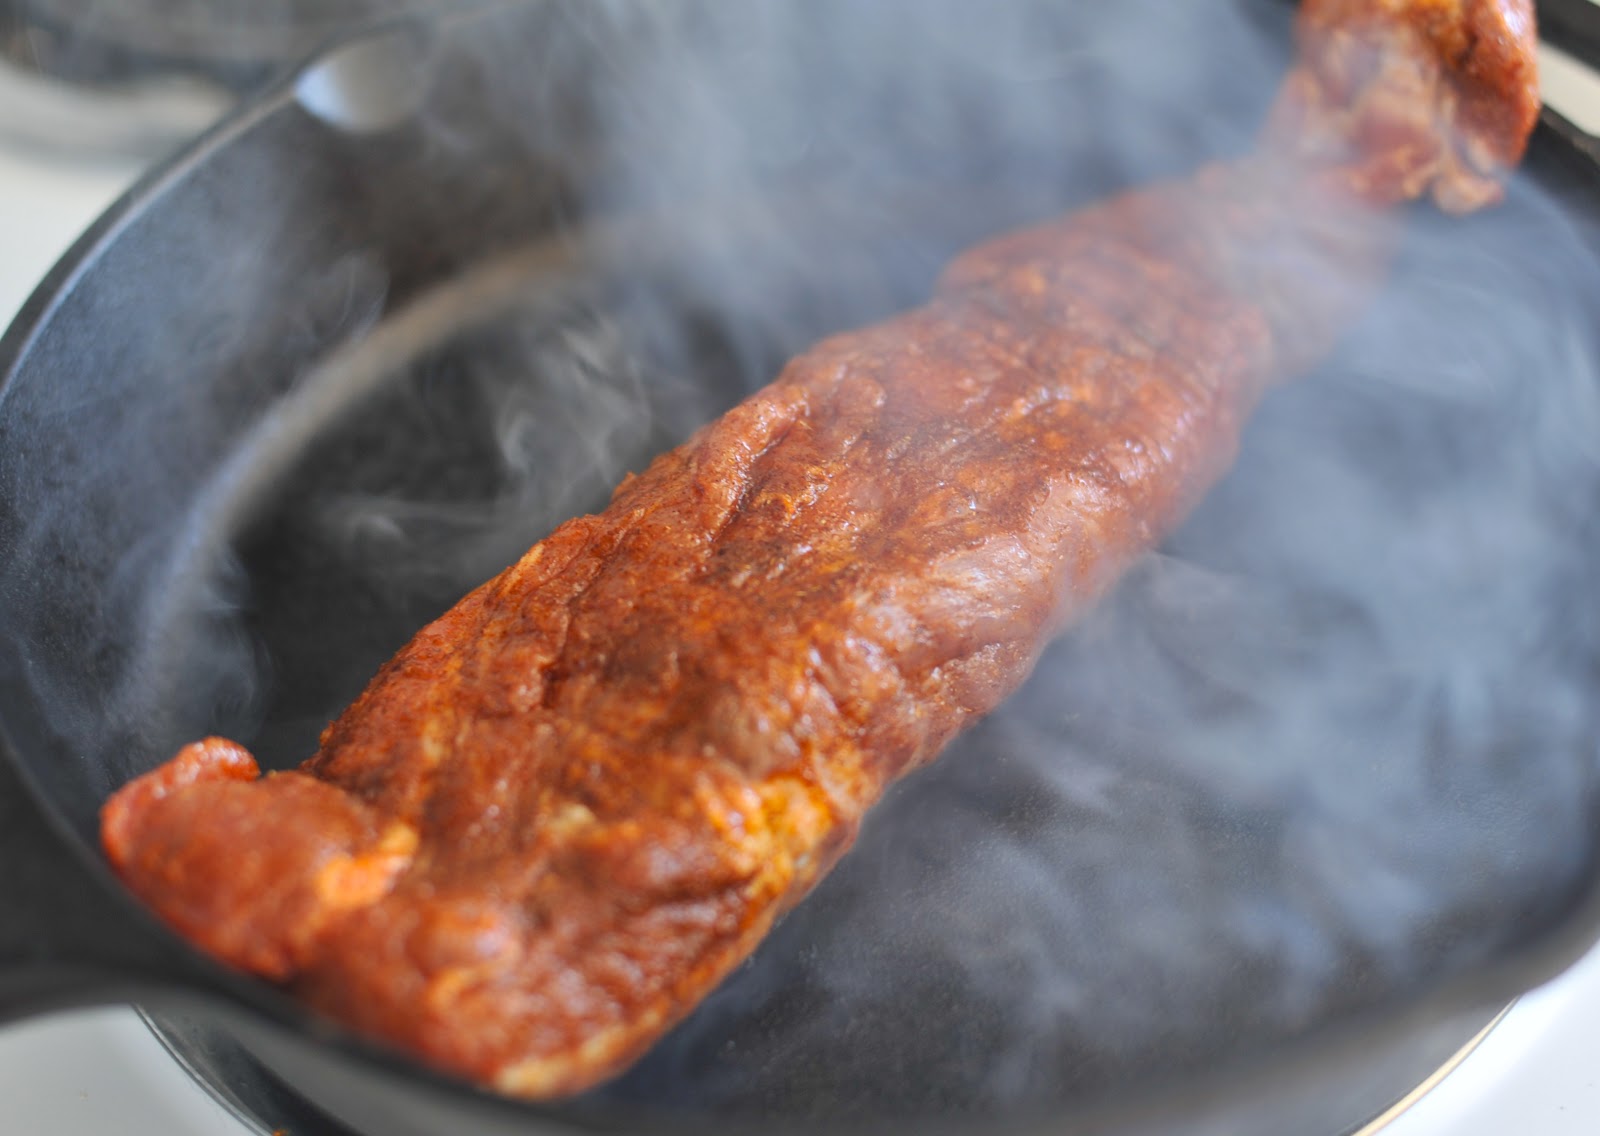
With tongs, carefully place coated tenderloin in hot skillet, sear for approximately 45 seconds - 1 minute per side.

carefully place coated tenderloin in hot skillet
quickly sear on each side, this is a little too brown

Using tongs, remove from skillet and place whole seared tenderloin in mixture inside slow cooker set to low and place lid.


Cook for approximately 3 1/2 hours, until tenderloin easily shreds with a fork. Be careful not to leave cooking too much longer since most of the liquid will be absorbed by this time. You may add additional chicken broth if needed to keep moist.

Using two forks, shred pork tenderloin and mix well.

shred with two forks
Turn slow cooker to warm until ready to serve.

Warm low carb (or your favorite) tortillas, top with shredded pork and your favorite garnishes like: cilantro, onions, cheese, sour cream.  And depending on your mood - pop the top on an ice cold Pacifico beer and enjoy with lots of fresh squeezed lime.

so yummy